
For patterns: Click Here
The DIY dish site is excellent, and they are giving away two free sewing machines!! I "sew" want one!!!!!!! *har *har *har =)
www.thediydish.com
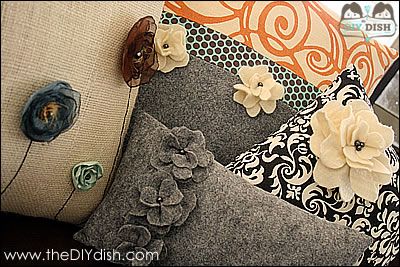
And... here's another twist on flowers- A zipper flower!
Studio 5 contributor, Kiersten Blanchard demonstrates how an inexpensive zipper and a little hot glue can add a little zip to anything from bags to head bands.
Needed:
Zipper (22" to 36" works best)
Scissors
Hot-glue gun (and glue sticks)
Hair clip, brooch clip, or headband
Optional:
Needle and thread
Felt scraps
Material scraps
Sparkly embellishments
Instructions:
1. To begin, open the zipper. Then, cut the zipper stop and reinforcement off of the zipper ends, leaving as much of the zipper as possible. Each zipper will make two flowers (one from each half).
2. Place a small dab of hot glue on the zipper tape (the fabric part) close to the end. Fold it over to create the center of the flower. Press down to secure. Be careful not to burn your fingers.
3. Roll the end around to continue forming a tight bud for the center of the flower. Secure with another dab of glue. Do this two or three times around, making sure the teeth of the zipper spiral down so that each row can be seen. Wrap around with increasing looseness two more times, securing with glue each time.
4. Begin making a petal by forming a loop which lies perpendicular to the bud and is secured with glue on the bottom of the bud. Make the next petal by looping the zipper in a figure eight with the first loop and securing on the back of the flower. Hint: Each time you create a petal you will wrap the zipper the same way. Repeat until you have the desire number of petals or have come to the end of the zipper.
5. You can trim the end to be behind the flower, or allow it to hang out and use a lighter to "fray check" the exposed end. You can hot glue the flower directly to a head band, or sew a clip to a small piece of felt and glue that to the back of the zipper flower.
6. Finish by adding any desired embellishments.
A couple of things I learned…
The best price on zippers I found was at Walmart, though local selection with metal zippers was limited in color to black, dogwood, white, and navy. In most of those colors you could choose the brass or aluminum teeth. (Joann's had the same selection for twice the price.)
You can choose from a large selection of colors and lengths at the following website for a very reasonable price: http://www.zipperstop.com/sitebuildercontent/sitebuilderfiles/ykk5brassmetalzip.htm or you can go to www.zipperstop.com to see all available options. I love the color selection!
The 22-inch polyester zippers come in great colors and work well for zipper flowers for little girls' accessories. The teeth match the zipper and aren't as heavy as the metal zippers.
Once you've figured out the looping pattern, experiment with the size of your petals for different looks. If you wrap tightly, you will get small pointy petals. Larger loops result in large rounded petals.
For an extra large flower, you can begin as usual, and add the second zipper where the first one runs out. Just trim the first zipper as needed so that the end of one and beginning of the next are hidden in the back. (See large white flower with aluminum teeth.)
If you leave a little room in the center of the bud, you can glue in a crystal for a little added sparkle. (See the black headband.)
If you don't want to add your flower as a permanent accessory, just skip the hot glue and attach it with a needle and thread.
And remember have fun…and don't burn your fingers!

just found your blog and wanted to tell you thanks for putting up my ideas! So nice to meet you! BTW-great tutorial on how to make pom poms. I had forgotten how they did it on Studio 5.
ReplyDeleteHey, well thanks Tausha for sharing your ideas with us!!! =)
ReplyDelete